Having a personal setup in a local environment is one of the things to be able to deepen the stack of knowledge we learn and can save costs, but in some cases we want our local server to be accessible to the public, one of the ways is to have a public ip, but this is a method that is less commonly used for personal use because it is quite expensive,
And there are several cheaper and more efficient methods including using cloudflare tunnels and vpn servers in the cloud.
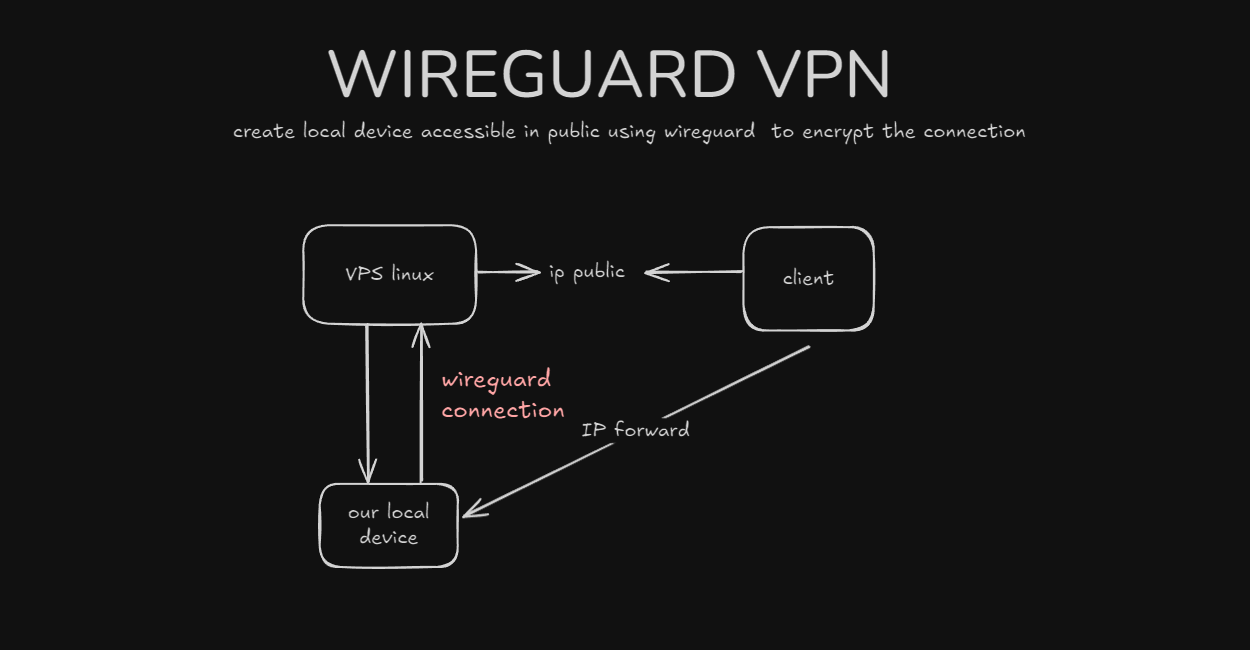
in this article I will discuss using wireguard vpn as a bridge to connect local servers to the public internet.
Table of Contents
Open Table of Contents
Prerequisites
- Atleast have Cloud Provider Account like AWS, GCP, Azure, Digital Ocean, etc. (for this demo i use digitalocean)

- 1 VM in cloud , atleast 1gb 1 vcpu
- 1 VM in our local host (for this demo running docker wordpress)
Prepare Wireguard on local VM and VPS
so first we have to install wireguard on the client and server side, for installation on the client side we can adjust to our operating system
sudo apt update && sudo apt upgrade
sudo apt install wireguard
sudo apt install openresolv
then we have to generate private key, public key and presharekey
#generate key for server

#generate privatekey
wg genkey

#generate pubkey
printf '***privatekey**' | wg pubkey

#presharekey
wg genpsk
Setup Server and client
The iptables rule in the WireGuard configuration serves to forward incoming TCP connections to ports 80 and 2279 on the public Ethernet interface to the internal address 10.200.200.2 on ports 80 (HTTP) and 22 (SSH) via DNAT in the PREROUTING chain, as well as applying MASQUERADE in the POSTROUTING chain on the wg0 interface to mask the source IP address of outgoing packets, thus ensuring the return connection from the internal server can reach the external client correctly.
Server Config (/etc/wireguard/wg0.conf)
[Interface]
Address = 10.200.200.1/24
PostUp = iptables -t nat -A PREROUTING -i eth+ -p tcp --dport 80 -j DNAT --to-destination 10.200.200.2:80;iptables -t nat -A PREROUTING -i eth+ -p tcp --dport 2279 -j DNAT --to-destination 10.200.200.2:22;iptables -t nat -A POSTROUTING -o wg0 -j MASQUERADE
PostDown = iptables -t nat -D PREROUTING -i eth+ -p tcp --dport 80 -j DNAT --to-destination 10.200.200.2:80;iptables -t nat -D PREROUTING -i eth+ -p tcp --dport 2279 -j DNAT --to-destination 10.200.200.2:22;iptables -t nat -D POSTROUTING -o wg0 -j MASQUERADE
ListenPort = 51820
PrivateKey = wP7SvXLdI*******************

[Peer]
# Client 1
PublicKey = X4DDGGVTXc2********************
AllowedIPs = 10.200.200.2/32
PresharedKey = MJ2kGzARa*********************
Client Config
[Interface]
Address = 10.200.200.2/32
PrivateKey = kJtW0efv4*********************
DNS = 8.8.8.8

[Peer]
PublicKey = aCRc5+Onxu/********************
PresharedKey =MJ2kGzARa******************
Endpoint = 167.***.**.***:51820 #fill with your ip vps
AllowedIPs = 10.200.200.1/24
PersistentKeepalive = 21
then we can applied in (/etc/wireguard/wg0.conf) on server (our vps) and client (our local vm).
and watch for port forward settings in sysctl on each vm
# do this in vpn server and client
nano /etc/sysctl.conf
net.ipv4.ip_forward=1
sudo sysctl -p

sudo systemctl enable --now wg-quick@wg0.service
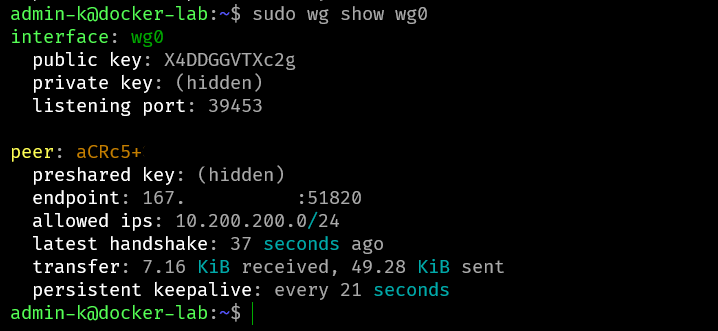
Testing connection
And then we can see in each device in local and vps already connected using wg show
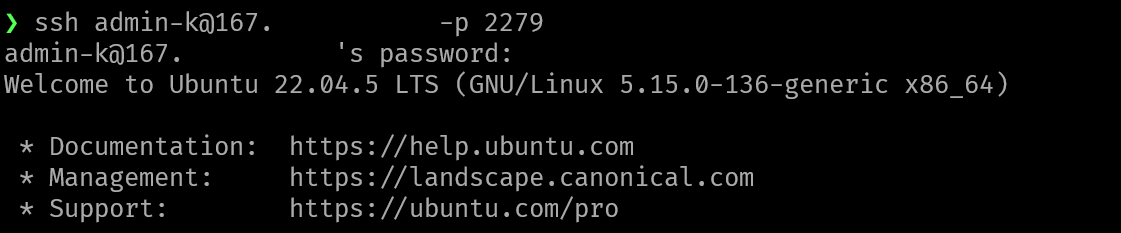
then we can access our settings for port 22 in port 2279
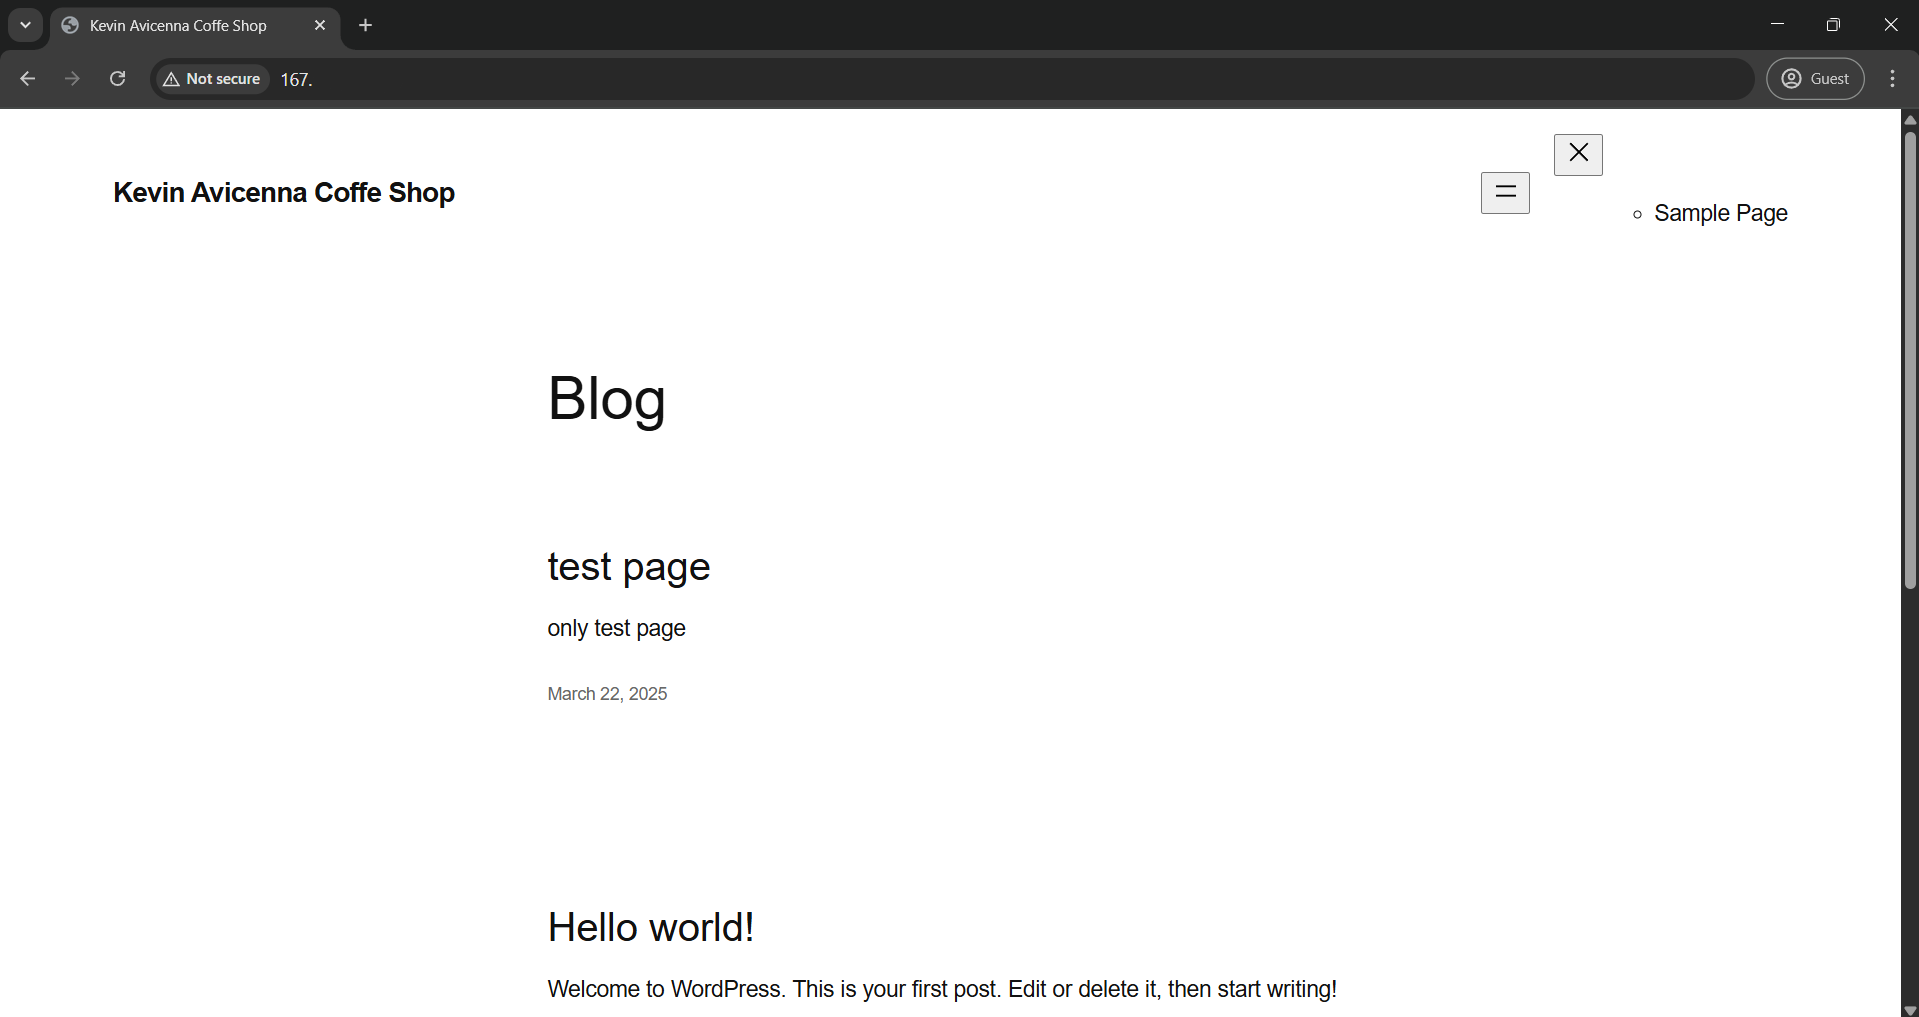
in this testing purpose, I use my personal local vm, for example I expose 80 for wordpress
thank you for visiting, I hope it is useful, if you have suggestions and feedback, you can visit instagram.com/kevinavicennaaa